Resources can be created manually, or you can upload them using a CSV file and the Salesforce Data Import Wizard.
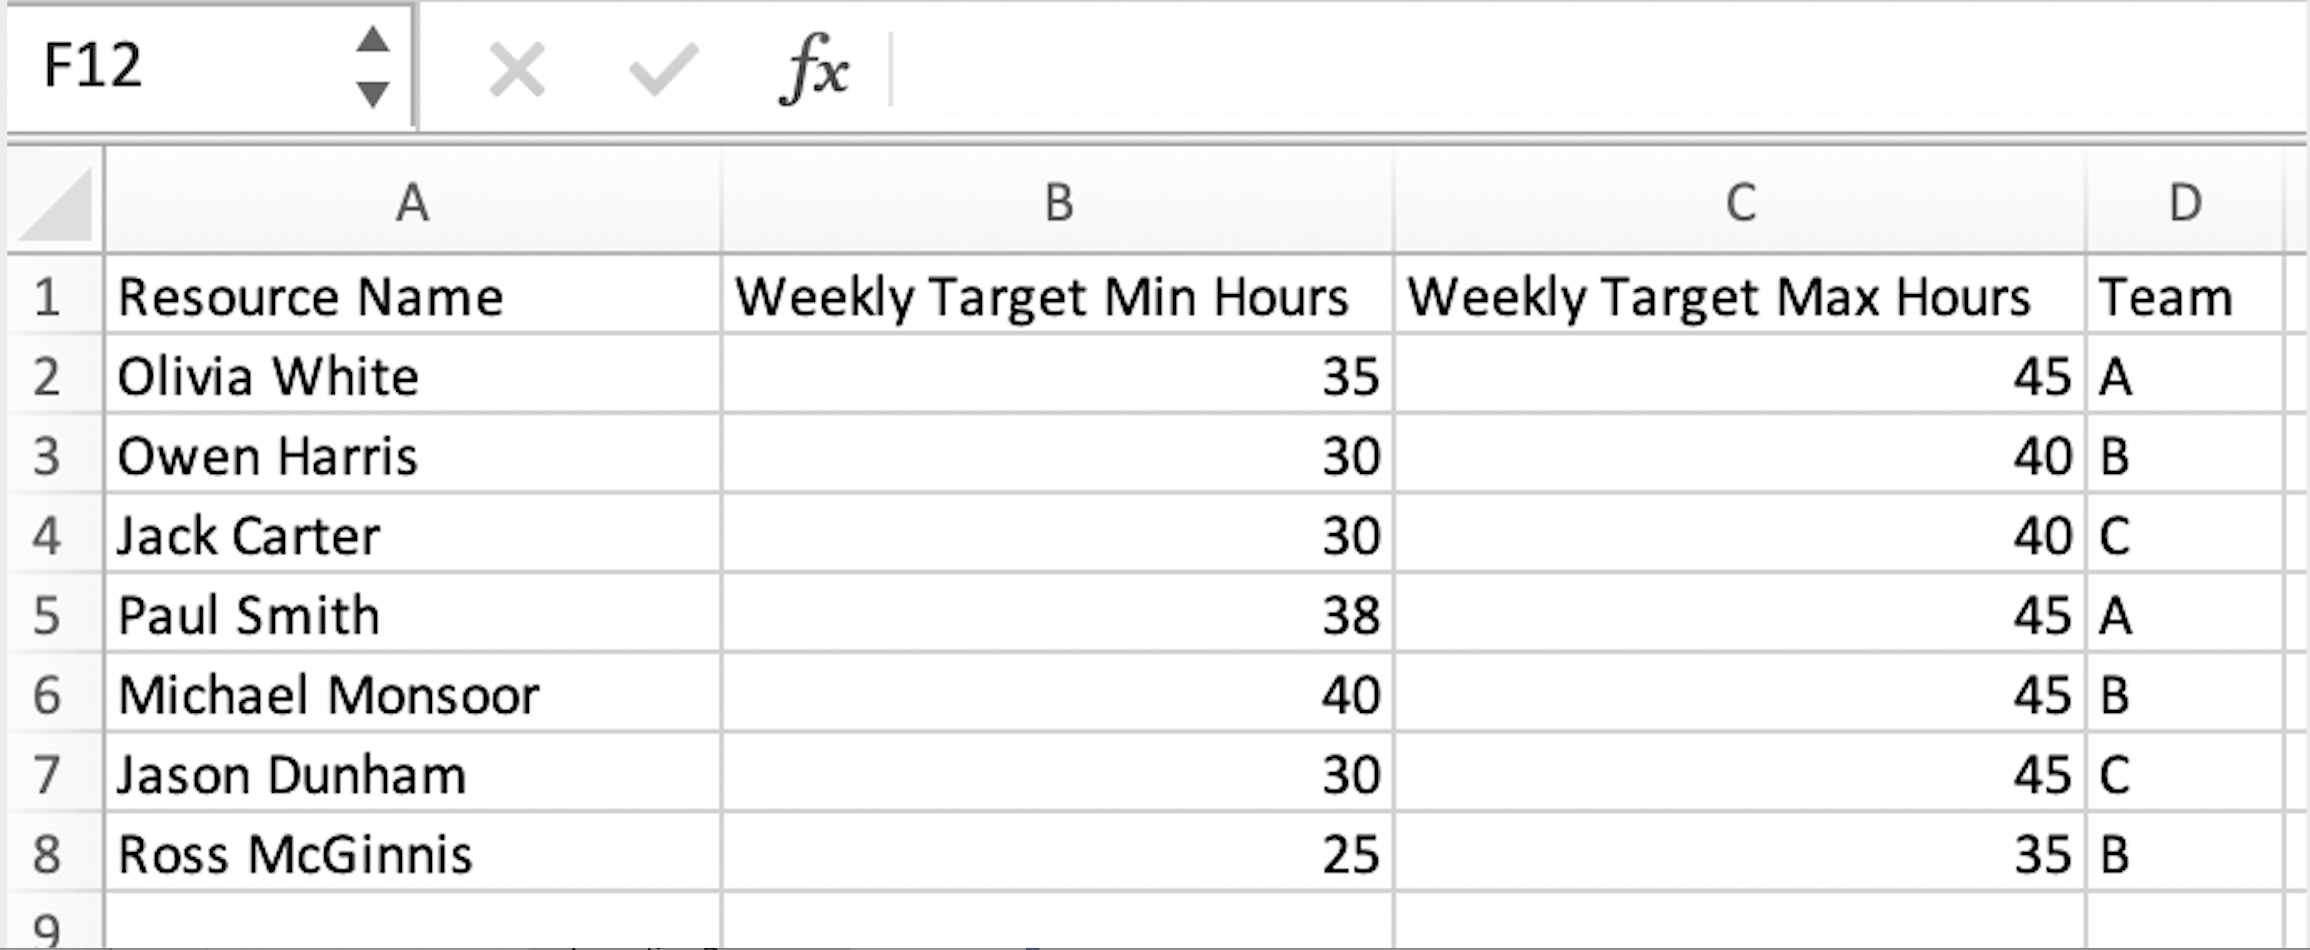
Create a CSV file and include the desired field columns
- Resource Name (Required)
- Weekly Target Min Hours
- Weekly Target Max Hours
- Team
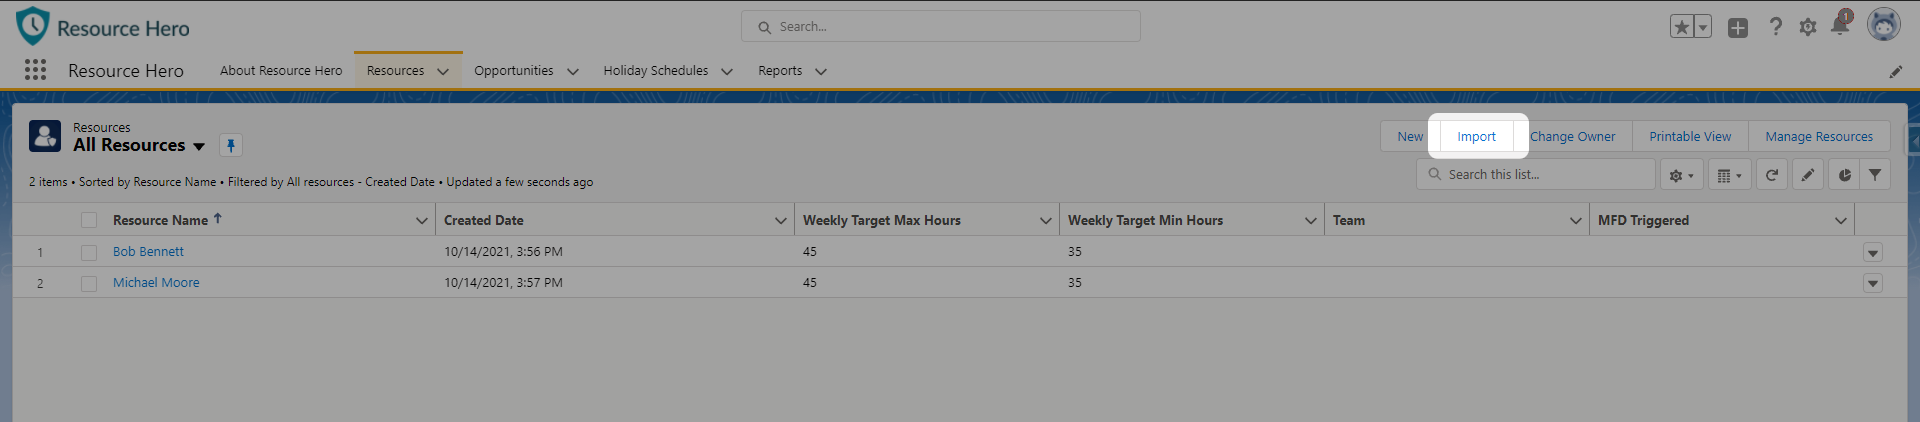
Once you have created your Resource CSV file, you can import your resources to the Resource Object.
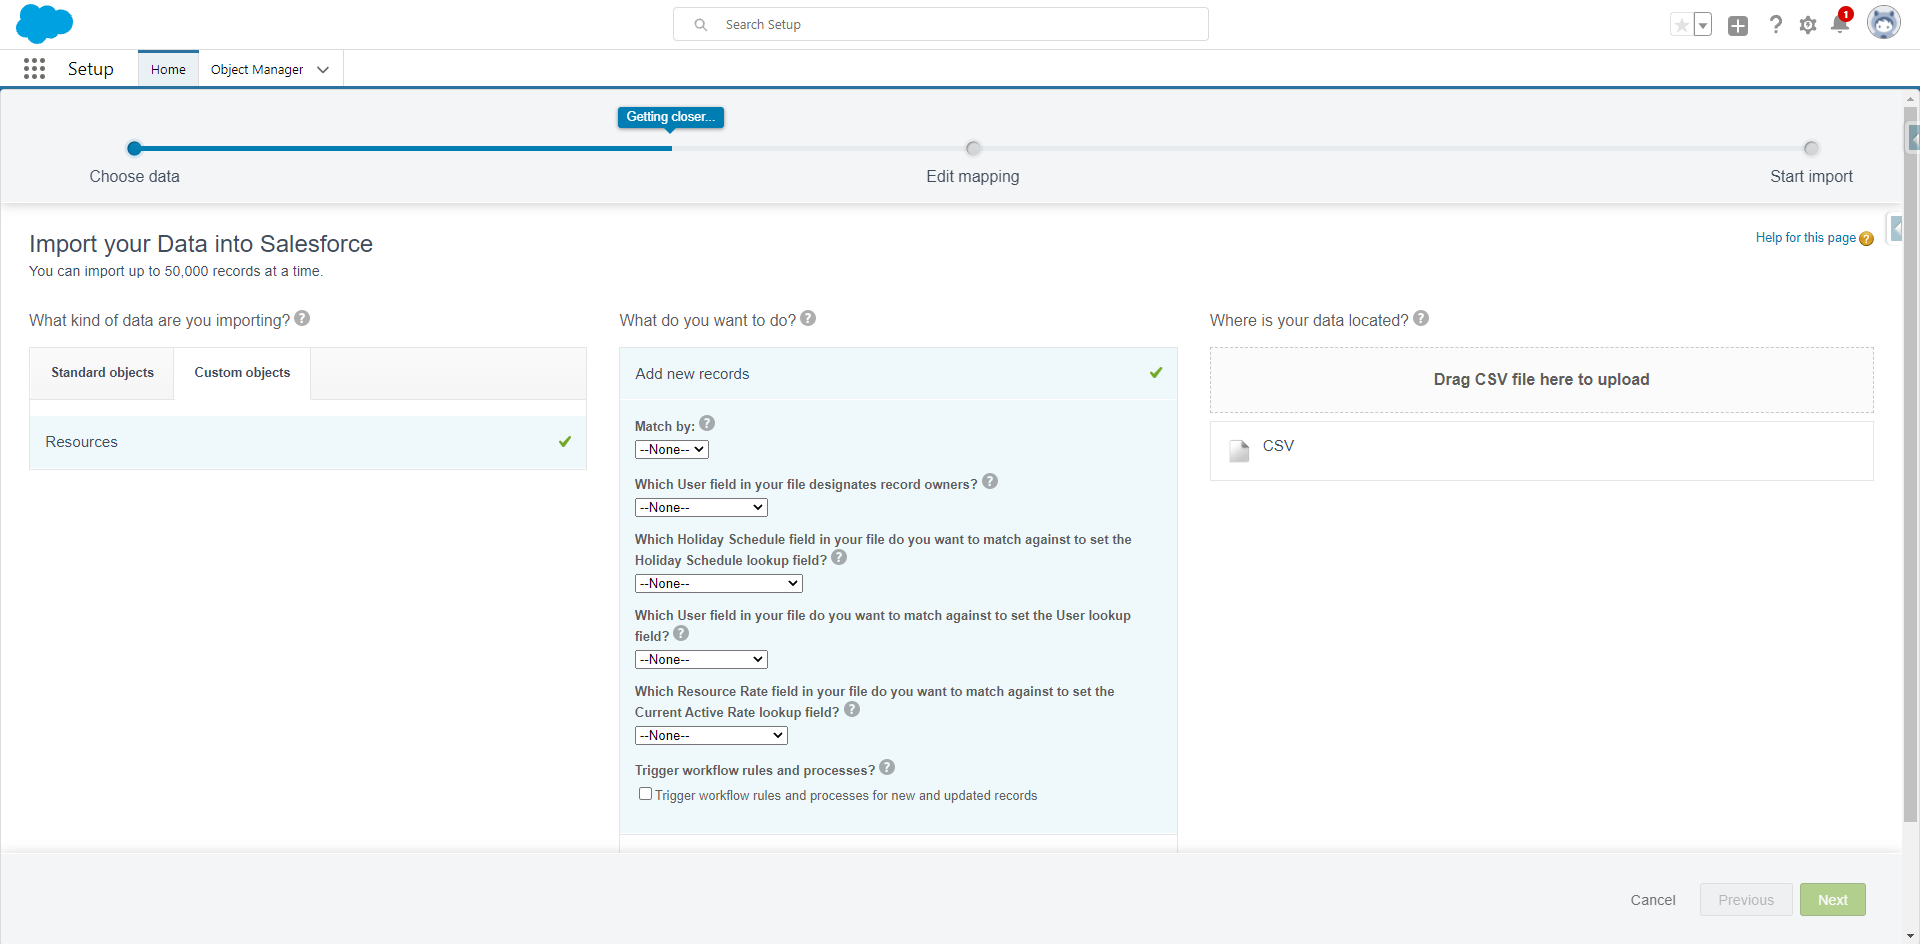
In Data Import Wizard, select Resources, and then Add New Records. Drag your CSV file to the indicated box to upload.
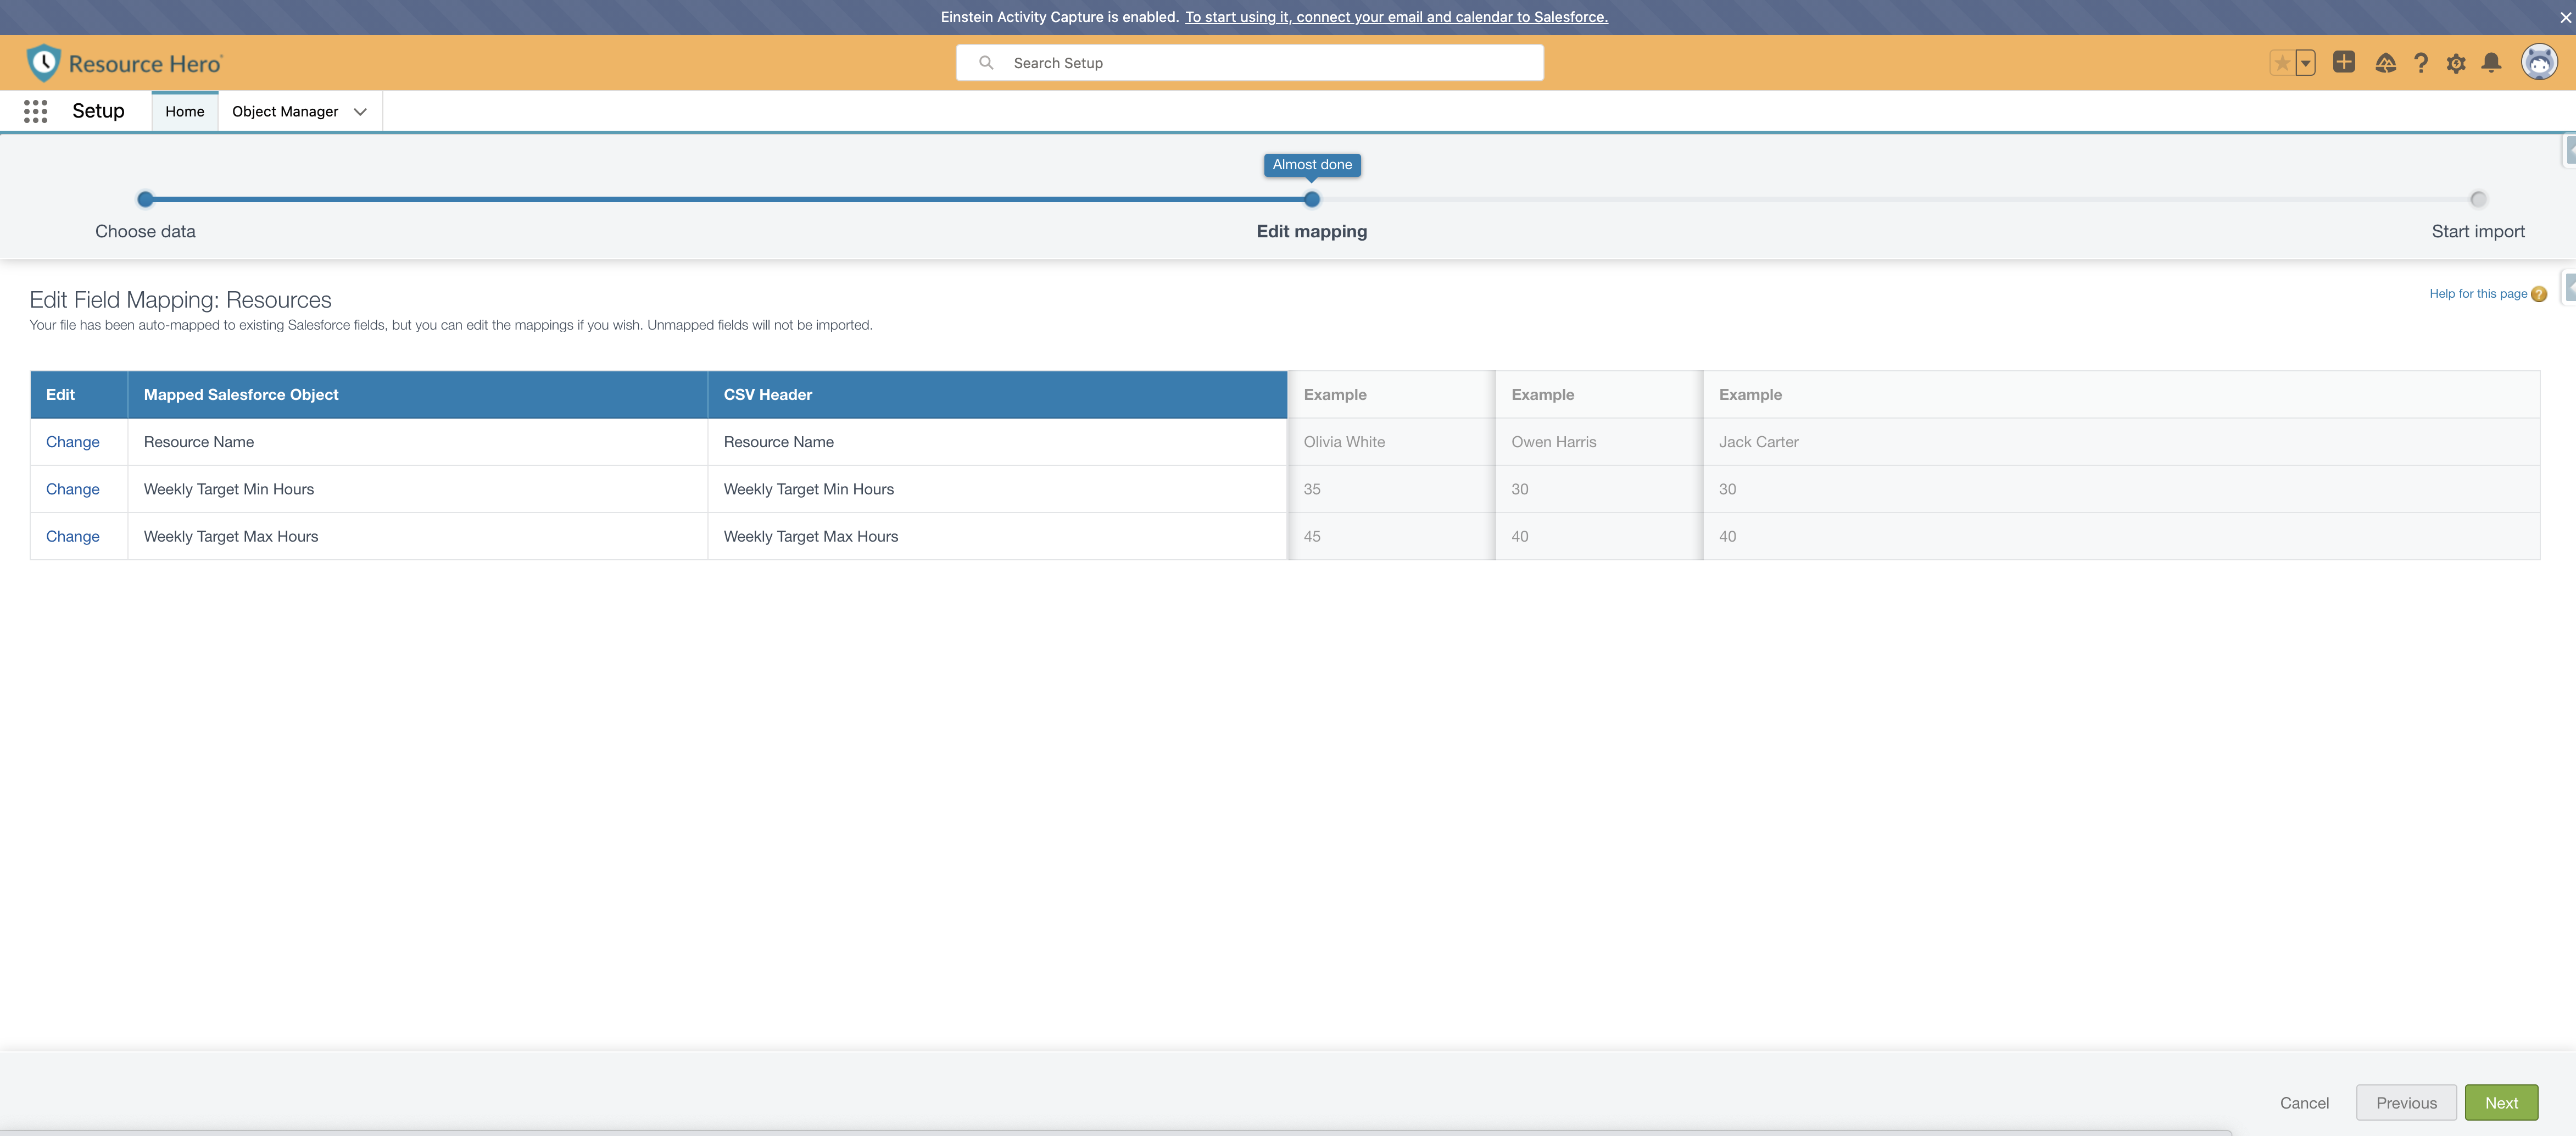
Ensure your fields are mapped correctly. The column header must match the Field Label.
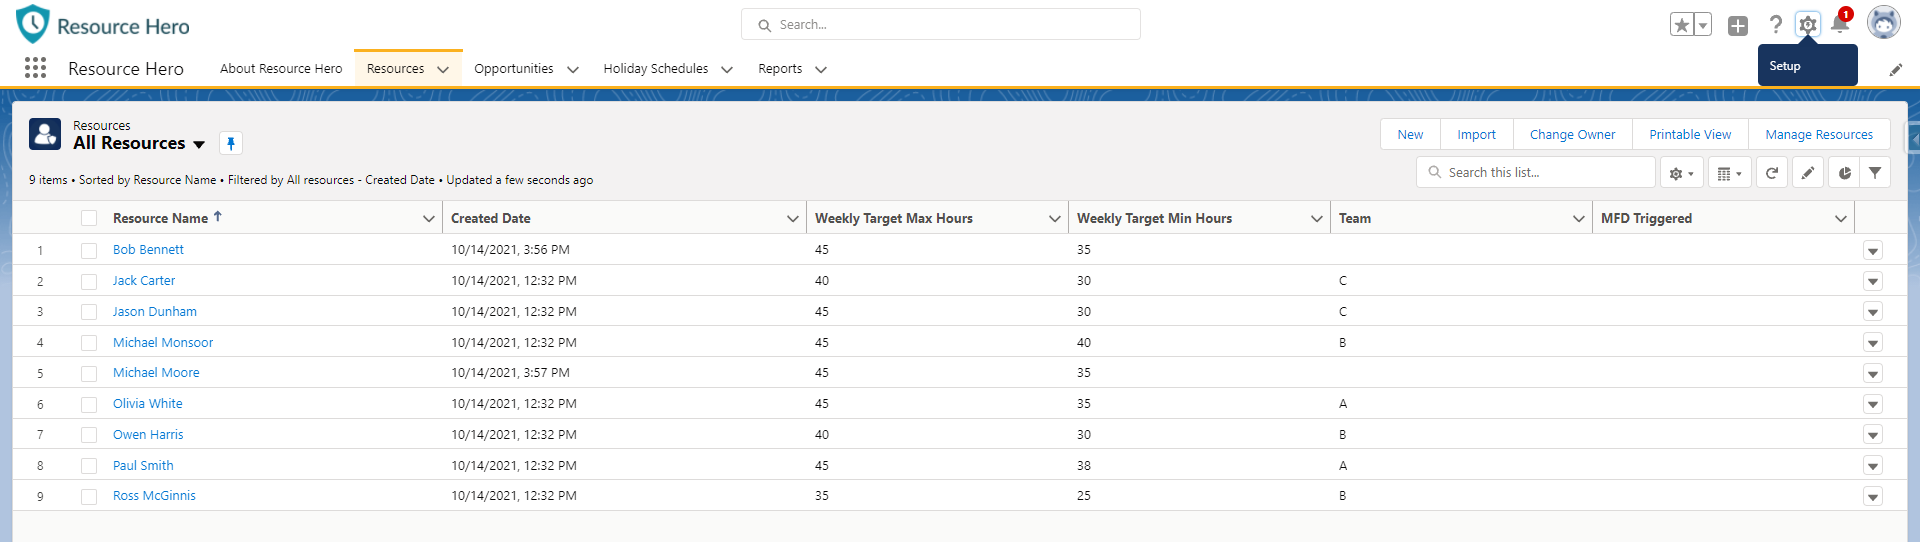
You should now see your imported Resources with your chosen fields in the Resource tab.